
I am going to show you just How Easy it is to Use Wealthy Affiliate Site Content Editor for building out your web pages.
We will start from where we log in and show you two different ways to get to the Site Content Editor.
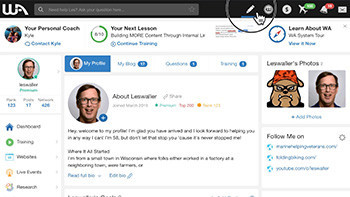
The first way I will show you is by clicking on the pencil icon up on top of the Wealthy Affiliate page.

Following that, you click on the purple pencil icon on the right that says “Write an Article”.

This is the Site Content Editor page. Before we go any further, let me show you another way to get here.

Back at the beginning, we could also have clicked “Websites” on the left-hand side.

Then clicked “Site Content” on the left.

And, that brings you right back here to the Site Content Editor.
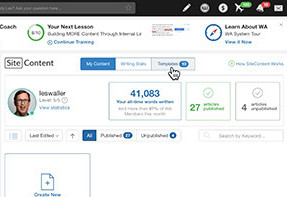
From here, we have two choices we can make. One, we can select a template from templates that we have already setup.

As an example, these are the templates that I currently have set up for my personal use. When you first log into your account you will have a few basic templates to start with and there will be training to show you how to make and use the templates, as well.
For our purposes, we are going to start with a clean slate.

Therefore, we will start by clicking on “Create New”.

The Site Content Editor still gives us a 2nd chance to either use a Writing Template or “Start a Blank Document”, let’s click that!

Now we are in the actual Site Content / Editor working area. Yay! \o/
You will type in your title of the article in the block that says “Title goes here”.
You will see below where your title goes are a line of blocks. From left to right they are:
- H1 – this is for Heading size 1 font (cannot be used in a bullet form in editor)
- H2 – this is for Heading size 2 font
- H3 – this is for Heading size 3 font
- p – normal paragraph font
- B – Bold font
- i – italics font
- U – underlined font
- Justification – left, center, right, & default
- Links – for inserting links or unlinking links
- Ordering –
- for bullets
- or numbered lists
- Lines – for putting a line across the page
- Images – for inserting images either from your library or by uploading from your pc
- Spell Checker – checks grammar, spelling, punctuation, and sentence structure
- Save – saves your document, much like Ctrl-S on PC or Command-S on Mac
- Publish – publishes your document to your webpage

Now that we have a title and the first heading, let’s import an image by clicking on the Image button.
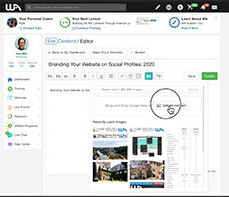
Since we are loading the image from my computer, I will click “Upload Manually”.
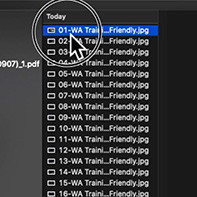
Then, select the image you want to upload.

Next, you will crop the image if you need to by left-clicking and dragging the white boxes to where you want the image cropped. It must be within the image itself or to the boundaries of the image and not outside of it.
I would recommend making the file the size you want prior to uploading it to the Site Content Editor.
You can also set the left, right, or center justification for the image. I have set mine to centered.
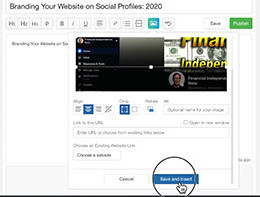
Once you are happy with how it looks, you can click “Save and Insert”.

Now, that the photo is in there, I’ve set my title line to H2.

And, I’m going to center justify it.

Let’s say for argument’s sake that we are finished writing our article and we want to publish it.
Slow down!
First, let’s take advantage of the Spell Checker that is so much more than a spell checker. Click the “ABC” block.

As you can see here, it is recommending that I put a comma between Twitter and you. I agree so I click the correction that is the text in green.

Here’s a case where I agree that the word is misspelled but I want to add my own spelling. So, I put it in the block that says “Enter your own correction…” and click “Use This”.

Just like anytime you are using computers and you are creating something, I highly recommend saving often by clicking the “Save” button in the upper right.

If you have more than one website or more than one type of article you are going to write but want to keep them in separate “folders”, then click “Bucket” and you can save them in a list that you define. I keep one for each website.

Now we are getting to where we want to publish our article. We have written it, included images, spell checked it, and saved it. Let’s click that “Publish” button! \o/
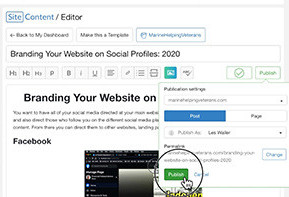
There are several steps we need to go through here and we start from the top and go down, just like a waterfall.
The first thing we do is select what website we want to publish it to, then we select whether it is a post or a page. Most often you will use post, like blog posts. The time to use pages is when you want to have a permanent page, for example, a legal disclaimer, privacy policy, and maybe your about me page.
Next, we will select the user we are publishing this page as.
The Site Content Editor gives you a chance here to change your permalink if you want to and it is better to change it here than once you’ve published it. We don’t want to confuse Google now, do we?
Finally, click “Publish” in the lower left corner of that popup.

Now, the Site Content Editor gives you several choices of where to go from here. You can view your post, edit your post in wordpress, create more content or you could submit your page for site comments.
Well, in less than 1000 words we’ve shown you how easy it is to Use Wealthy Affiliate Site Content Editor.
Any questions???
Let me know in the comments below!
If you would like to see my review of Wealthy Affiliate that I did recently, head over to Wealthy Affiliate Review 2021.
