Branding Your Website on Social Profiles: 2020
You want to have all of your social media directed at your main website. This will help to give it validity in search engines and also direct those who follow you on the different social media platforms to go to one central location to find your content. From there you can direct them to other websites, landing pages, training, you name it.

We begin by working on our Facebook page. Wherever you are on Facebook, you can start by clicking the Home icon in the upper center of the page.

After you have done that you go to the upper left side of the page and click your name.

Once here, head over to the center area and click “Edit Profile”.

Scroll down and click “Edit” to the right of Customize Your Intro”.

In this example I clicked “Edit” after my most recent work experience. You could also click “Add a workplace” if you want.
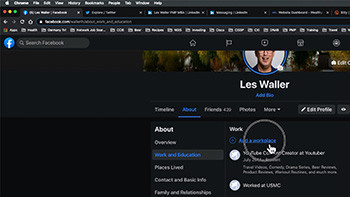
Once you are offered it, click “Add a Workplace”.
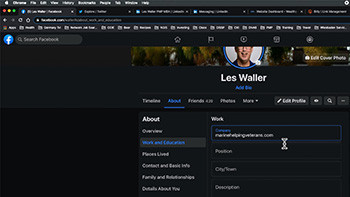
Under Work > Company you can either type in a valid URL and it will auto-populate with possible answers to select from or if not you just put in your own URL or company name.

For my purposes, I put in my main affiliate marketing website that is designed to help veterans build an online business prior to them leaving service so that they have more options and/or a chance to be self-employed Under position, I went ahead and put “owner”.
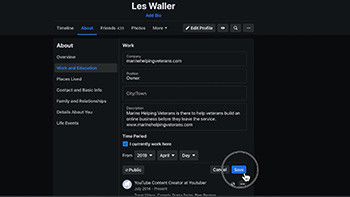
Under the description section you should have your 30 second elevator speech and it should match across all of your social media platforms as it is part of your branding. In a future article I will explain in greater detail about how to develop your 30 second elevator speech because it is important to have that in your toolbox and be able to use it at the drop of a hat.
The time period you can leave blank, if you like. I put mine equal to the time I joined the Wealthy Affiliate team. Once you are satisfied with your input, go ahead and click “Save”.

It’s not necessary now, but if you would like to Share this on your News Feed, then go ahead.
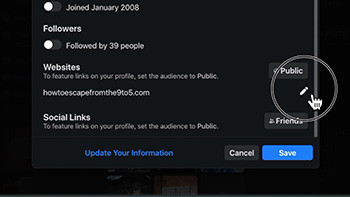
Next, go back into your Facebook profile like we did above and scroll down until you see “Websites”. Click on the pencil icon and it will open up the “Contact and Basic Info” section.
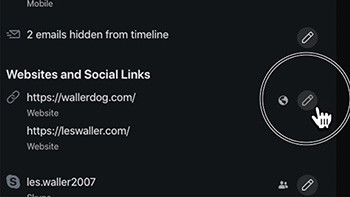
Here to the right of the “Websites and Social Links” click the pencil icon.
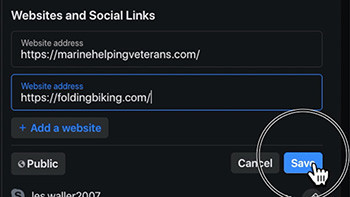
Add in your website(s), if necessary by clicking “+ Add a website” for subsequent websites you want to add. When you are finished, go ahead and click “Save”.

Here you’ll see the results of the information that you just entered. You can check it to make sure it is correct. You’ll notice the “New Notification” I got on the left as I was making this. That was actually as a result of me sharing my update that we did earlier. 🙂
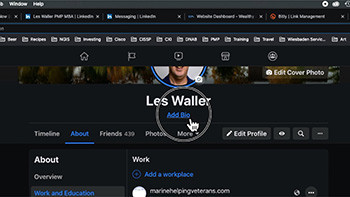
If you’ll look on the top of the page, underneath your profile picture, you will see a place where you can add your bio. Click “Add Bio”.

Here again you want to put something in there that fits with your elevator speech you had in the description. Click “Save” when you are done with the Bio.

The next social media platform that we will prepare is Twitter. When you are on your Twitter page first click “Profile” on the left side of the page. Then you will be able to see “Edit Profile” in the middle below your banner image.
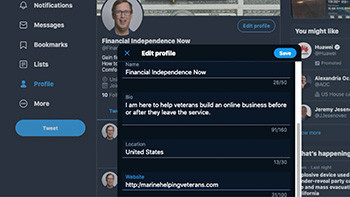
On Twitter, you can put in your Bio (30 second elevator speech), as well as, your website.
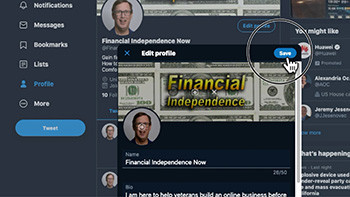
When you are happy with that, go ahead and click “Save”.
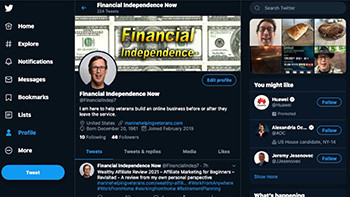
Check to see that everything is correct and then we will move on to the next platform.
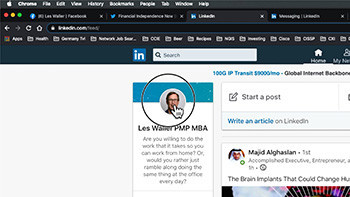
From your LinkedIn home page, click on your profile picture.
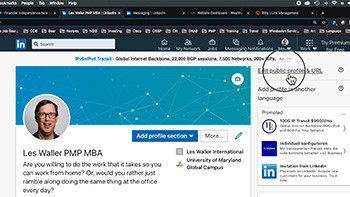
Click on “Edit public profile & URL”. A new tab on your browser will open.

Click on “Edit contents” under Edit Content on the right side of the page.

Next, click on the pencil icon to the right of “Add profile section”.

Here you have a headline that you can add, be sure to incorporate your 30-second elevator speech in here. You can also add your Current Position. It’s not shown here, but scroll down to “Profile URL, Websites, Email, Twitter, WeChat ID” and click the pencil icon on the right.

This will bring up the area where you can add your websites to your LinkedIn profile.

After you are finished adding your info, go ahead and click “Apply”.
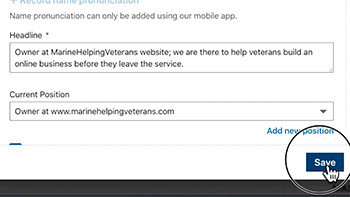
And “Save”.

Now you can inspect the results of the information that you entered for your profile.

Wealthy Affiliate
That leaves us with the final one for this article, Wealthy Affiliate. Click on your profile picture in the upper left.

Click where it says “My Profile”.

I didn’t show you, but on the right side of “Follow Me on” there is a gear icon. Click the gear icon and then you will see the view up above. There is a space to add Instagram, Facebook, Twitter, and multiple websites. If you left click on one of the globes to the left of a website you can change its position relative to the other websites. Once you are satisfied with your input, go ahead and click “Save changes”.

You should be able to see your social media platforms and/or websites on the right side of the page just below “Follow Me on” now.
I hope this article helps to show you how you can put your brand across multiple social media platforms like Facebook, Twitter, LinkedIn and of course Wealthy Affiliate.
If you have any questions or if any platforms have changed their look, let me know and I’ll update this page.
Cheers!
Les


I think your site will be a big success with veterans. This article on how to join and keep a steady social media profile is another great one from your website. I personally liked it that u have guided everyone through all steps in creating an account.
May I also suggest other important social media platforms such as Instagram, YouTube, Pinterest, etc. There are very popular now and maybe an article on these will be useful.
Thanks and regards,
Aps
I think that’s a great idea! Heck, I even have a Youtube channel that details a lot about social media platforms and how to build an audience on them.
Check out this video when you have time!
Hello Les, online business has gone way beyond how anyone pictures it and I have been really keen on learning all I can every day and it’s been really good and helpful so far. Making use of social media to get awareness for your business is a smart choice and I really do not know there would be a way to brand it, but this has been a great starting step for me.
Well, just stop by every now and then and we will have more information published on how to build your business and make a social presence. Thanks for stopping by!